Choosing Fast Curing Uv Resin in 2026 requires more than comparing curing times. A resin that hardens in seconds may still produce weak layers, surface tack, or excessive heat. The right choice depends on wavelength compatibility, viscosity, cure depth, shrinkage, and the final application.
In practical testing, I examine a small sample before committing to a full project. I use the intended UV lamp, record exposure time, and check the surface after cooling. A reliable Fast Curing Uv Resin should cure evenly under the lamp’s stated wavelength, not only under ideal laboratory conditions. Clear resin may cure differently from pigmented resin. Thick pours can remain soft inside, even when the surface feels solid. That detail is easy to miss.
Look for a current technical data sheet, safety data sheet, batch information, and clear storage guidance. Reputable suppliers should explain recommended wavelengths, exposure ranges, shelf life, and compatible materials. Customer reviews can reveal odor, yellowing, or nozzle problems, but they should not replace controlled testing. Personal results may vary with lamp age, room temperature, mold shape, and layer thickness.
Fast does not always mean better. A slightly slower formula may offer stronger adhesion and cleaner detail. I have also learned that marketing terms can sound more precise than they really are. Test before scaling up. Work with suitable ventilation, gloves, eye protection, and responsible disposal practices. A careful comparison helps balance speed, finish quality, durability, and dependable performance throughout 2026.
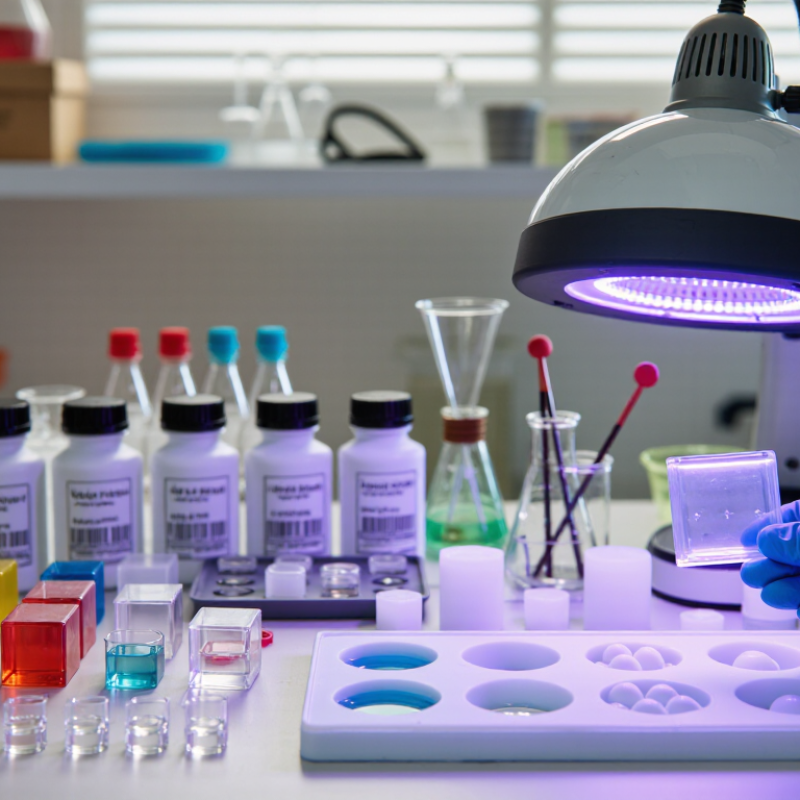
Fast-curing UV resin is a liquid photopolymer that hardens under ultraviolet light. Its photoinitiators react when exposed to a suitable UV wavelength. This reaction links small molecules into a solid plastic structure. The curing speed depends on lamp intensity, wavelength, resin thickness, and exposure distance.
Not all fast resins cure evenly. A thin, clear layer may harden in seconds, while a deep or dark piece needs longer exposure. I usually test a small drop on a disposable surface before making the final object. A properly cured surface feels firm and looks consistent. A sticky surface often indicates weak light, insufficient exposure, or oxygen inhibition. Thin layers help reduce this problem.
Temperature also changes performance. Cold resin flows slowly and may trap bubbles near sharp corners. Gentle warming can improve flow, but excessive heat may distort details. I measure curing time instead of trusting the label alone. In practical work, two layers with the same thickness can behave differently. Pigments, embedded objects, and dusty surfaces all affect light penetration. I still occasionally cure pieces too quickly and find soft areas underneath. That mistake reminds me to rotate complex shapes and inspect hidden edges. A reliable choice should include clear technical data, stable curing behavior, and safety guidance for handling uncured material.
How to Choose Fast Curing UV Resin in 2026?
Which Performance Factors Matter for Curing Speed
Fast curing begins with the correct wavelength, not a shorter timer. A 2024 RadTech industry report identifies spectral compatibility, irradiance, and exposure dose as key UV-curing variables. Match the resin’s photoinitiator response to the lamp’s peak wavelength. A mismatch can leave a tacky surface, even under intense light. More power is not always better.
Layer thickness also changes curing speed. In photopolymer systems, light penetration decreases as the resin absorbs and scatters energy. The 2024 Wohlers Report highlights process control as a major factor in polymer additive manufacturing consistency. For practical testing, cure 1-millimeter and 3-millimeter samples separately. Record exposure time, surface hardness, and internal stickiness. Small details matter.
Viscosity deserves attention. Thick resin moves slowly and can trap bubbles between layers. Oxygen inhibition may slow surface curing, especially around thin edges. Temperature affects flow and reaction rate, too. I usually test at a stable room temperature, but this is not perfect. A resin that cures in 8 seconds on one machine may need 14 seconds elsewhere. Measure actual irradiance with a calibrated radiometer, then calculate dose as irradiance multiplied by time. Do not trust the timer alone. Also check dimensional shrinkage, heat buildup, and post-cure strength. Speed without reliable conversion can create brittle parts and hidden defects.
| Performance Factor | Typical Data or Range | Effect on Curing Speed | What to Check Before Selection | Practical Priority |
|---|---|---|---|---|
| Recommended UV Wavelength | 365, 385, 395, or 405 nm, depending on the photoinitiator system | Curing is fastest when the lamp spectrum closely matches the resin’s absorption peak. A wavelength mismatch can leave the surface tacky or greatly increase exposure time. | Match the resin specification with the lamp wavelength rather than relying only on lamp wattage. | Critical |
| Required Exposure Time | Commonly about 5–60 seconds for thin layers under a suitable UV lamp; thicker sections may require repeated exposure | A lower exposure time generally indicates faster surface conversion, provided the result is fully cured and not only skin-cured. | Compare test times at the same wavelength, irradiance, distance, layer thickness, and temperature. | Critical |
| UV Irradiance at the Work Surface | Often approximately 5–50 mW/cm² for small UV curing setups; actual usable output varies by lamp and distance | Higher irradiance usually shortens cure time, but excessive intensity can cause overheating, shrinkage stress, yellowing, or incomplete curing beneath the surface. | Measure irradiance at the resin surface with a calibrated radiometer instead of using electrical lamp wattage alone. | Critical |
| Energy Dose | Calculated as irradiance × exposure time; for example, 20 mW/cm² × 10 s = 200 mJ/cm² | Dose is more useful than time alone because it combines lamp intensity and exposure duration. The required dose depends on formulation and thickness. | Ask for the minimum dose needed to achieve full cure, not only a nominal curing-time claim. | Critical |
| Cure Depth per Exposure | Thin UV-curable layers may cure in fractions of a millimeter to several millimeters, depending on transparency and formulation | Greater effective cure depth can reduce the number of exposure cycles, but excessive depth may increase internal stress or cause light scattering. | Test the actual maximum thickness and confirm that the bottom is hard, not only the exposed surface. | High |
| Viscosity at 25°C | Low-viscosity UV resins may be below 1,000 mPa·s; heavily filled or gel-like systems can be much higher | Lower viscosity improves wetting, leveling, bubble release, and thin-layer uniformity, which can make curing more consistent. It does not by itself prove faster photopolymerization. | Check viscosity at the intended processing temperature and confirm that the resin does not trap bubbles. | High |
| Optical Clarity and Pigment Loading | Clear formulations generally transmit more curing light than opaque, strongly pigmented, or heavily filled formulations | Pigments, dyes, fillers, and dark colors absorb or scatter UV light, reducing cure depth and increasing the required dose. | Run separate exposure tests for each color and verify through-cure rather than transferring clear-resin settings. | High |
| Oxygen Inhibition | A thin tacky surface layer can remain when curing is performed in air, especially with acrylate-based systems | Surface oxygen consumes reactive radicals and can make a fast-curing resin appear under-cured even when the bulk is solid. | Check whether the formulation supports inert-gas curing, a transparent film cover, or a final post-cure. | High |
| Resin and Ambient Temperature | Many technical tests are performed near 23–25°C; lower temperatures commonly increase viscosity and may slow processing | Temperature affects viscosity, diffusion, reaction rate, and heat generation. Excessive temperature can shorten working time or damage the part. | Compare products at the same controlled temperature and follow the supplier’s safe operating range. | Medium |
| Post-Cure Requirement | A post-cure may require additional UV exposure ranging from several minutes to longer, depending on part size and formulation | A resin with a very short initial cure may still have a slow total process if it needs extensive post-curing to reach final hardness or low tack. | Evaluate total cycle time, including washing, drying, post-curing, and cooling. | Critical |
| Conversion, Hardness, and Surface Tack | Typical verification methods include tack testing, Shore hardness, gel-fraction or solvent-resistance checks, and dimensional inspection | A fast apparent cure is not useful if the material remains soft, tacky, dimensionally unstable, or chemically under-cured. | Select the fastest resin that meets the required final properties after the complete curing process. | Critical |
Note: The ranges shown are general engineering reference values, not guaranteed specifications. Actual curing speed depends on formulation, lamp spectrum, irradiance, exposure distance, layer thickness, color, temperature, oxygen exposure, and required final properties.
Choosing fast-curing UV resin starts with project geometry, not advertised seconds. Thin jewelry, labels, and shallow prints usually need surface cure and low viscosity. Deep molds need controlled penetration, lower shrinkage, and staged exposure. A 2024 RadTech UV+EB market report highlights growing use in 3D printing and industrial coatings. Speed remains application-dependent. Match resin wavelength to lamp output. A resin requiring 405 nm may underperform under a 365 nm source. Test compatibility before buying bulk material.
For a 3 mm clear casting, begin with 1 mm layers or short exposure cycles. Check the center, edges, and underside after curing. A hard surface can hide a soft core. Measure tack-free time, dimensional change, and peak temperature. The U.S. Department of Energy reports UV processing can use up to 90% less energy than thermal curing in suitable applications. Overexposure still creates heat and brittleness. Choose the fastest setting that preserves detail, adhesion, and safe handling. Fast is tempting. Sometimes, it is wrong.
Use technical data sheets, not marketplace claims. Look for viscosity, recommended irradiance, wavelength range, cure depth, Shore hardness, and post-cure instructions. Smithers’ 2024 report, The Future of UV/EB Curing to 2028, forecasts roughly 8% annual market growth. That forecast cannot predict your lamp, mold, or room temperature. My practical rule is simple: run three small samples. Change one variable each time. I still see failures after “perfect” tests, often from pigment, dust, or weak lamp output. Record the result, then select the resin that meets the project’s actual tolerance.
Match the resin to your project by comparing layer thickness with a practical starting exposure window. Thinner layers generally cure faster and more evenly, while thick sections require multiple layers or a different resin system.
The bars show practical starting ranges in seconds for clear UV resin exposed with a compatible 365–405 nm LED lamp. Use thin layers for jewelry, coatings, and small details; for sections above 2 mm, cure in several lifts to reduce soft centers, overheating, bubbles, and surface distortion.
Important: Actual curing time depends on resin formulation, pigment opacity, lamp wavelength, irradiance, distance, and mold transparency. Always follow the resin supplier’s technical instructions and test a small sample before production.
To compare UV resin fairly, control the test conditions. Use the same mold, layer thickness, lamp distance, and exposure angle. Record room temperature and resin temperature before each trial. Small changes can affect curing speed. My early tests failed because I moved the lamp between samples.
Begin with a simple cure-time test. Apply a thin, measured layer to a clean glass sheet. Expose separate samples for 5, 10, 20, and 30 seconds. Check each surface with a nitrile-gloved finger. It should feel firm, not slippery or tacky. Record the shortest reliable time. Do not judge one sample alone.
Then test strength with identical strips. Cure them fully, condition them overnight, and bend them slowly by hand. Note cracking, whitening, or permanent distortion. For better evidence, use a basic force gauge and repeat each test three times. A fast cure may produce a brittle part. That trade-off matters.
Surface quality needs its own inspection. Use angled light to reveal ripples, pits, fingerprints, and uncured edges. Measure visible yellowing after curing, especially around thin corners. A smooth surface can still hide weak internal curing. I once accepted a glossy sample too quickly; it cracked during drilling the next day. Test results should be logged with exposure time, lamp output, and sample thickness. If the results conflict, repeat the test rather than forcing a convenient conclusion.
How to Choose Fast Curing UV Resin in 2026?
Fast curing should never be the only selection test. A resin curing in 30 seconds may still remain sticky under an incompatible lamp. Check its required wavelength, recommended exposure time, and maximum layer thickness. Reliable products provide a current Safety Data Sheet, clear handling instructions, batch information, and traceable quality testing. I also examine the liquid before use. Excessive odor, separated ingredients, or unusual color deserve caution.
Tips: Wear nitrile gloves and protective eyewear. Use strong ventilation, not just an open window. Test a small piece first. Cure both sides when possible, then inspect the surface after cooling. Keep the bottle closed and away from sunlight, heat, children, and food areas. Never judge safety by smell alone.
In workshop testing, I compare hardness, flexibility, surface tack, and color stability after several days. A fast result is meaningless if the model cracks during handling. Choose a resin that matches your lamp and project material. Confirm whether it is suitable for thin details, molds, coatings, or jewelry-like crafts. I once trusted a quick cure label and skipped a small test; the center stayed soft. That mistake was avoidable. Supplier responsiveness also matters. Clear answers about storage, curing, and batch differences suggest better reliability, although no product is perfect.
Start with the project geometry, not the advertised curing time. Thin jewelry-like pieces need low viscosity and quick surface curing. Deep molds need controlled penetration and lower shrinkage. A fast resin can still be the wrong choice.
Check the resin’s required wavelength and your lamp’s output. A resin designed for 405 nm may cure poorly under 365 nm light. Test compatibility before buying a large bottle. Small tests prevent expensive mistakes.
Use identical samples, the same lamp distance, and equal layer thickness. Cure separate samples for 5, 10, 20, and 30 seconds. Check each surface with a gloved finger. It should feel firm, not slippery or sticky.
Yes. A glossy surface may cover a soft center. Inspect the center, edges, and underside after curing. For a 3 mm casting, try 1 mm layers or short exposure cycles. I once trusted the surface too quickly.
Cure identical strips fully, then condition them overnight. Bend them slowly and record cracking, whitening, or permanent distortion. Repeat each test three times when possible. Fast curing may create brittle parts.
Use angled light to reveal ripples, pits, fingerprints, and uncured edges. Check thin corners for yellowing. Also inspect after cooling. A smooth surface does not prove strong internal curing.
Use the technical data sheet instead of marketplace claims. Check viscosity, irradiance, wavelength range, cure depth, hardness, and post-cure instructions. Confirm batch information and storage guidance. Claims can look precise, but your lamp may behave differently.
Wear nitrile gloves and protective eyewear. Use strong ventilation. Keep the bottle closed, cool, and away from sunlight, children, and food areas. Never judge safety by smell alone. Test a small piece first.
Choosing Fast Curing Uv Resin in 2026 requires more than selecting the shortest advertised cure time. This material hardens when exposed to the correct UV wavelength and intensity, so performance depends on resin formulation, layer thickness, light power, exposure distance, temperature, and pigment or filler content. A suitable resin should match the project’s purpose, whether it involves detailed models, jewelry, coatings, repairs, or functional prototypes. Consider the required hardness, flexibility, transparency, shrinkage control, surface finish, and resistance to heat or moisture before making a decision.
Before regular use, test a small sample under controlled conditions. Record curing time, inspect the surface for tackiness or bubbles, and evaluate dimensional accuracy, bonding strength, and resistance to cracking. Reliable selection also includes checking safety instructions, storage conditions, ventilation needs, packaging quality, batch information, and clear technical data. By comparing both performance and handling requirements, users can choose a Fast Curing Uv Resin that cures efficiently while delivering consistent, durable, and safe results.

Ever Ray